This page explains the older manual snippet method for WordPress.
If you are using the OneLence Connect plugin, do not use this page as your main setup guide. Use the dedicated Configure via OneLence Connect (WordPress) chapter instead.
Use this manual method only if:
- you cannot install the OneLence Connect plugin
- your setup still relies on manual snippets
- you need a fallback path for a custom WordPress environment
If your website is built with WordPress and you need the manual approach, the easiest way to configure tracking events is by using a script plugin such as Code Snippets.
This section shows practical step-by-step examples that do not require editing theme files.
These examples help you track real marketing behaviour such as:
- whether visitors reach a confirmation page
- how often important buttons are clicked
- whether key funnel steps are completed
Example 1. Track Visits To A Confirmation Page
Use Case
You want to measure when visitors successfully complete an action.
Typical situations include:
- after submitting a contact or signup form
- after joining a newsletter
- after booking a demo
- after completing onboarding
- after finishing a purchase flow
These pages are often called thank-you pages or confirmation pages.
Tracking visits to these pages allows OneLence to understand real conversion outcomes.
Why This Is Important
This tracking method is:
- simple
- reliable
- beginner-friendly
- accurate for campaign performance measurement
It ensures conversions are counted only after the action is truly completed.
Step-By-Step Setup
- Open Code Snippets inside your WordPress dashboard.
- Click Add New.
- Select Add Your Custom Code.
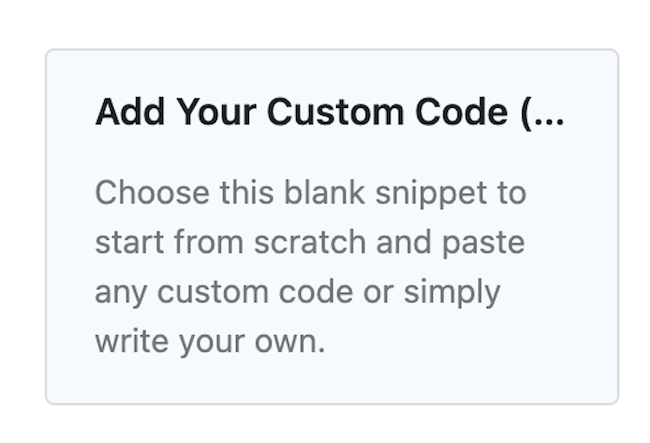
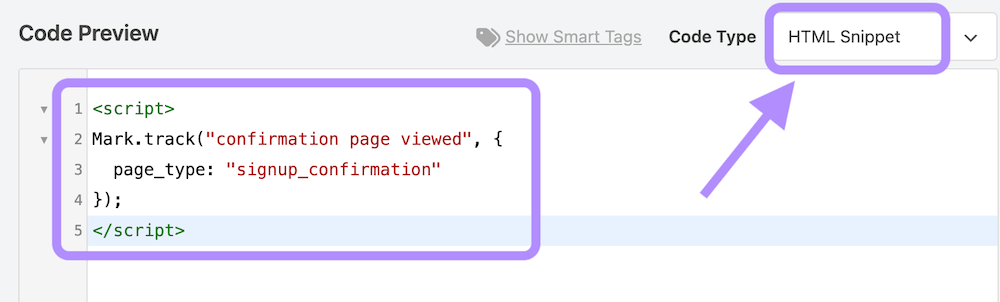
- Choose HTML Snippet.

- In the Code Preview block, paste:
<script>
Mark.track("confirmation page viewed", {
  page_type: "signup_confirmation"
});
</script>
📌 What This Code Mean
Event name — "confirmation page viewed"
This is the label of the action you want to record. It tells OneLence that a visitor reached a success page.
Event detail — page_type: "signup_confirmation"
This adds extra context about what kind of success happened. It helps you later compare different results like signup, purchase, or demo booking.
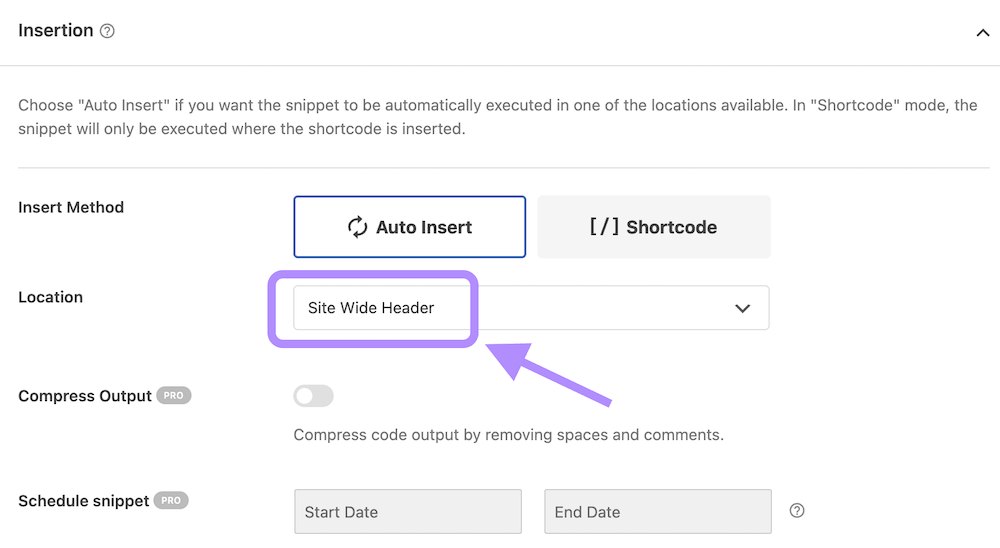
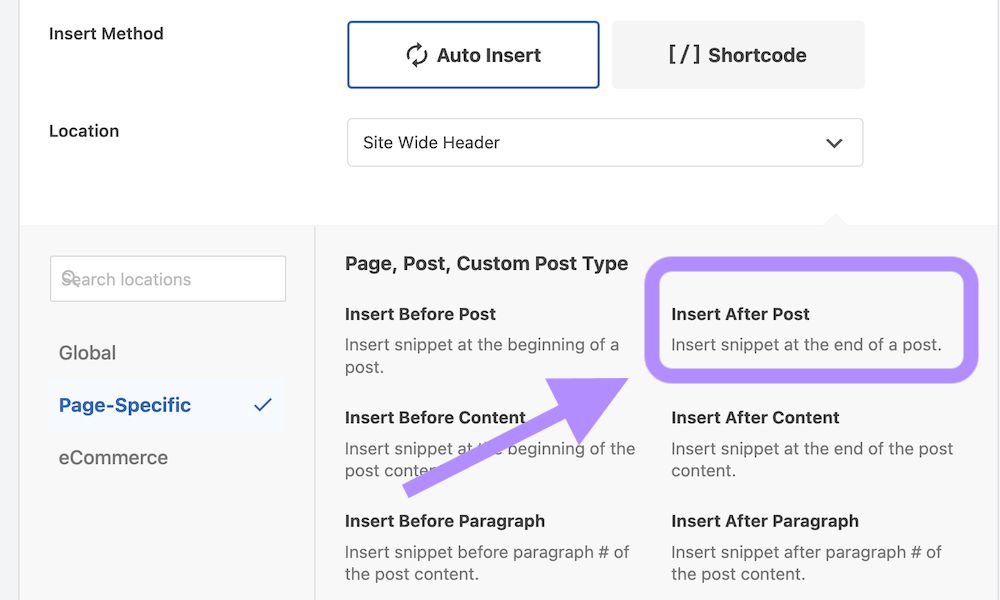
- Scroll to Insertion → Location.
- Select Page-Specific → Insert After Post.
- Scroll to Smart Conditional Logic.
- Enable logic.
- Ensure the condition type is Show.
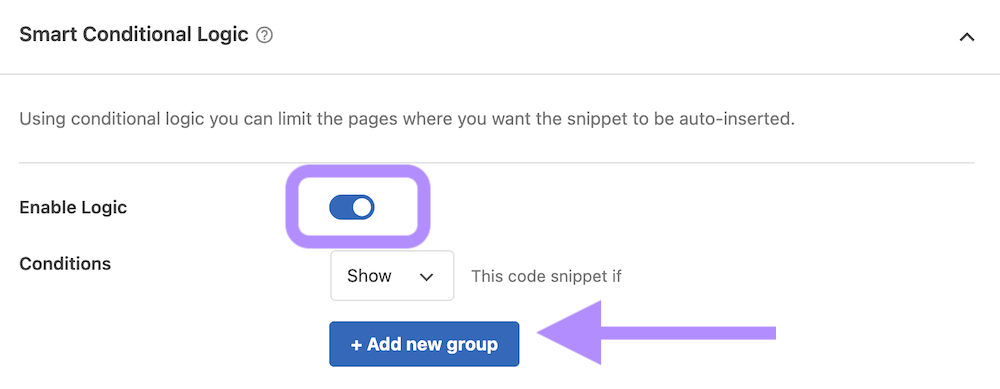
- Click Add New Group.
- Configure the rule:
- Target → Where (Page) → Page URL
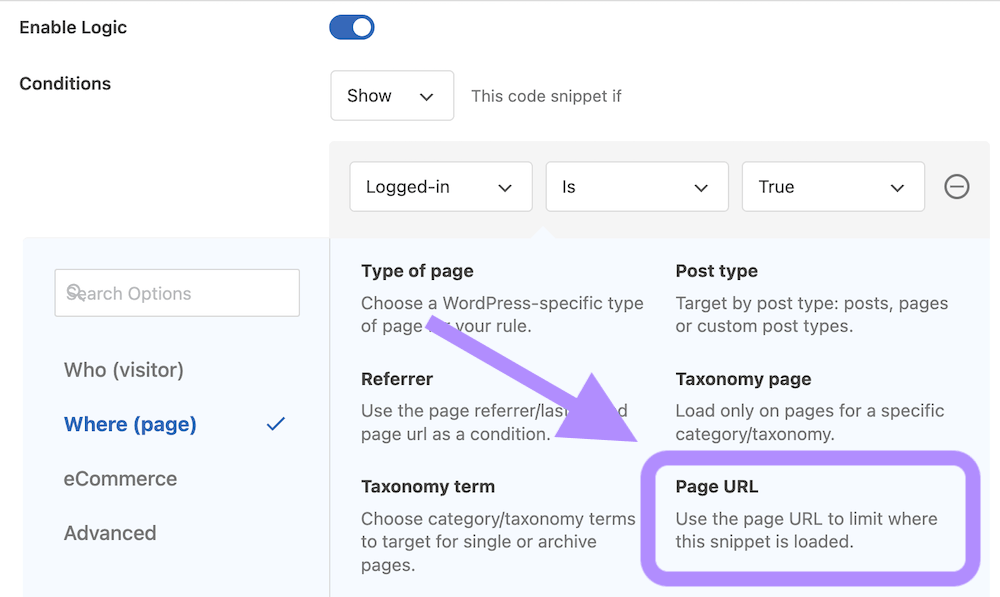
- Condition → Is
- Value → paste the exact page URL (e.g.
https://yourdomain.com/signup-confirmation)
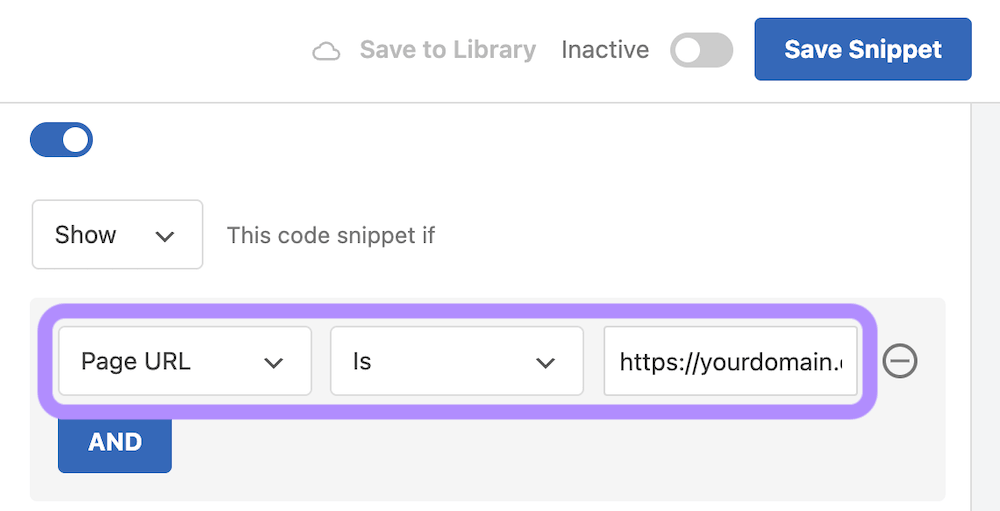
- Click Save Snippet.
- Return to the snippet list.
- Toggle the snippet On.

Now, whenever a visitor reaches this page, OneLence records the event.
Example 2. Track Clicks On A Specific Button
Use Case
You want to understand how often visitors interact with a key action.
Important buttons to track include:
- login button
- sign-up button
- newsletter submit
- add-to-cart button
- pricing CTA
- product detail clicks
- “book demo” button
This helps identify interest before conversion happens.
Why This Is Important
Button tracking helps you:
- measure funnel drop-off
- compare marketing channel engagement
- understand feature interest
- evaluate landing page performance
Step-By-Step Setup
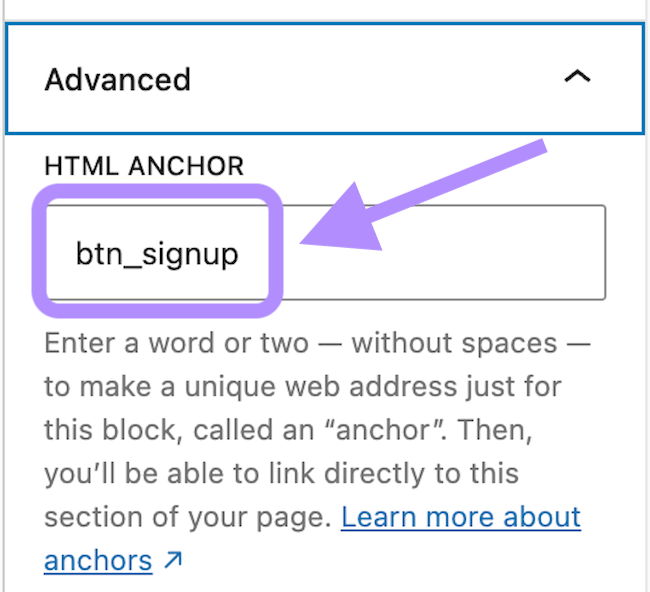
Step 1. Add An Anchor ID To The Button
Edit the page containing the button.
Add an ID attribute to the button element. For example:
You can also achieve this step through the html code:
<button id="btn_signup">Sign up</button>
The ID must be unique.
You can choose any clear name such as:
- btn_signup
- btn_demo
- btn_checkout
Step 2. Create The Tracking Snippet
- Open Code Snippets.
- Click Add New.
- Select Add Your Custom Code.
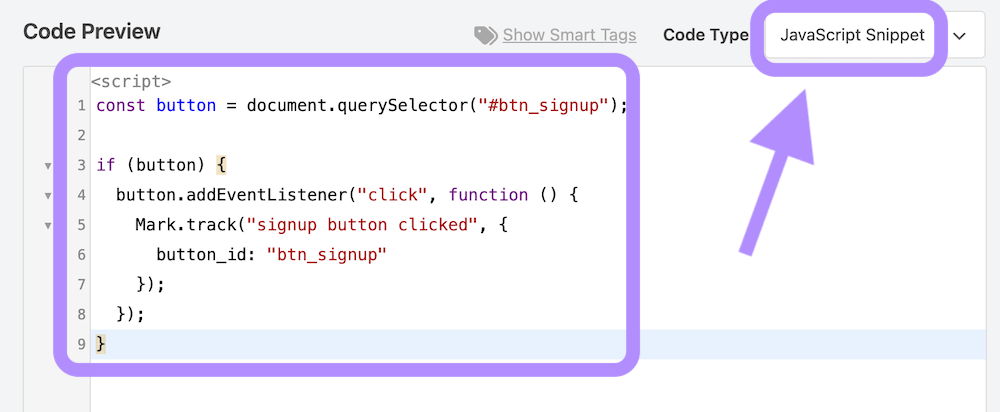
- Choose JavaScript Snippet.

- Paste the following code:
const button = document.querySelector("#btn_signup");

if (button) {
  button.addEventListener("click", function () {
    Mark.track("signup button clicked", {
      button_id: "btn_signup"
    });
  });
}
📌 What This Code Mean
#btn_signup → the button ID you created
"signup button clicked" → the event name shown in OneLence
button_id → optional detail for later analysis
Step 3. Configure Snippet Placement
- Scroll to Insertion → Location.
- Select Global → Site Wide Footer.
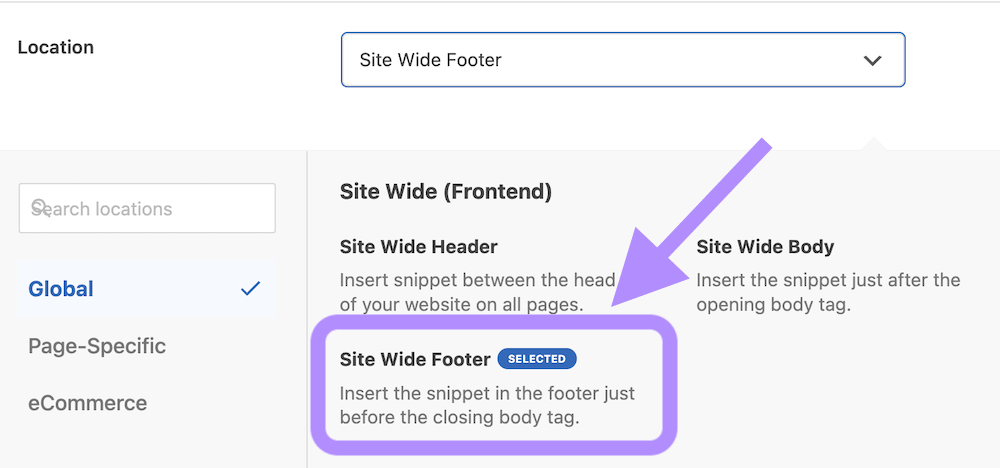
This ensures the tracking script loads on every page.
- Click Save Snippet.
- Return to the snippet list.
- Toggle the snippet On.
Now every time a visitor clicks the button, OneLence records the interaction.
Recommended Beginner Tracking Strategy
If you are new to tracking configuration, start with only:
- one confirmation page tracking snippet
- one important button click tracking snippet
This already provides valuable insight into campaign effectiveness and user behaviour.
You can expand tracking later as you become more confident.
What You Should See After Setup
After publishing changes and receiving traffic:
- confirmation page visits appear as events in OneLence
- button clicks begin appearing in engagement insights
- attribution reports connect marketing sources to these actions