This chapter covers the standard WordPress upload flow for getting OneLence Consent onto your website.
Install via ZIP Upload
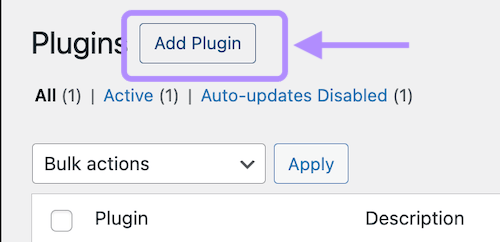
- In WordPress admin, go to Plugins > Add New Plugin.
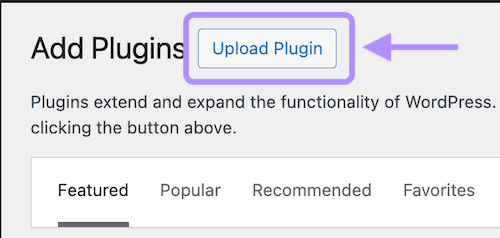
- Click Upload Plugin.
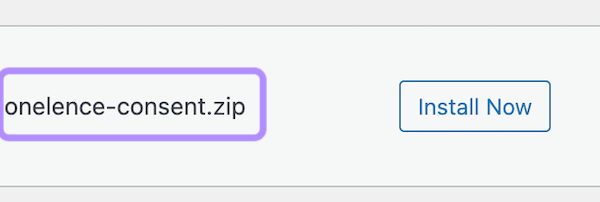
- Drag the OneLence Consent ZIP file into the upload area, or choose it from your computer.
- Click Install Now.
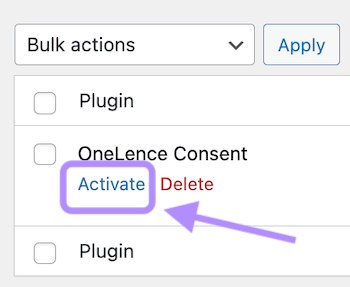
- After installation finishes, click Activate Plugin. (Confirm the usage even though there could be function-overlap with other plugins.)
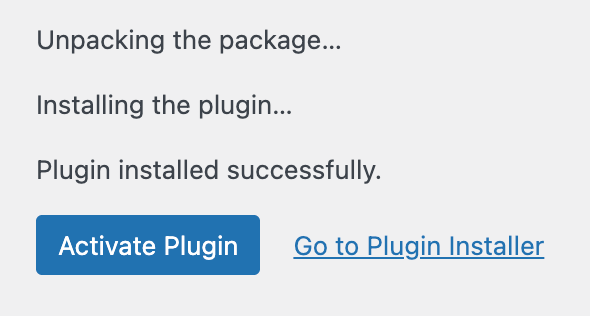
- Once the plugin is active, you should see OneLence Consent in your WordPress admin sidebar.
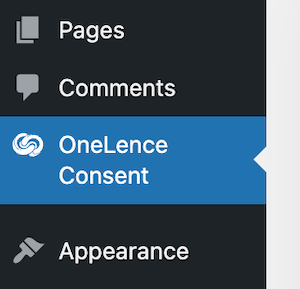
- Click OneLence Consent to open the plugin dashboard.
What To Expect Next
After activation, the plugin is installed but not necessarily fully configured yet.
Your next steps are usually:
- check the plugin status in the Overview tab
- turn on Enable plugin in OneLence Setup
- review banner behavior and service handling before going live